

Cropping a photograph is a powerful technique of visual design that you may be under utilizing. It’s more than just making a photograph fit your space. Cropping refers to the practice of removing portions of an image to change the focal point. Whether you download images from a stock photo site or shoot your own, there’s no reason to accept the photo as is. There are many reasons you may want to crop photos for eLearning.
Why Crop a Photo for eLearning?
Cropping gives you control over the image’s meaning and aesthetics. It allows you to create emphasis and a center of interest through better framing. Cropping is a way to zero in on the message you want to communicate and the story you want to tell.
To maintain the quality of detail after making the crop, start with a high-resolution image. Also, make sure you work on a copy and not the master version of the photo. Now, here are ten ways to get the most out of image cropping.
1. Crop to remove extraneous visual information
Most stock photographs—and even those from a custom photo shoot—include visual details on the edges of the photo that detract from the focus. By removing the cars and detail on the left, the cropped image on the right has a much stronger focus of a father playing with children. When you start with a high-resolution image, you can crop for a tight shot that results in a close-up without losing quality.

2. Crop for drama and intensity
If you are telling a story or persuading an audience, you can crop for a dramatic effect. By removing that extra unimportant space in the photo on the left, I was able to focus on the facial expressions and actions of the main subjects, as shown on the right.

3. Crop to leave space in front of a person
Leave extra room in front a person in the direction he or she is looking. Otherwise, there is a feeling that the scene is abruptly cut off, as shown on the left. The additional space in front of the person on the right adds to the perception of the expansive landscape.

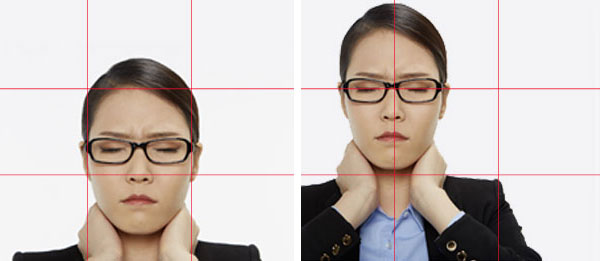
4. Crop to place the eyes in the top third of the frame
The woman with the headache, below on the left, has too much space above her head and she doesn’t appear to be at eye level. You can crop using the rule of thirds for a more powerful design, shown on the right. Place the eyes in the top third of the frame or right on the top third line. Additionally, you can place the important features in a third of the grid for a more compelling composition.
5. Crop to clip the head for a tight fit
If you want a very tight head shot or if you’re short on space, clip off the top of the head, as shown on the right. Crop above or below the hairline. If you crop directly on the hairline, it may look like the person’t forehead goes on forever. Clipping off the top of the head creates a strong and intimate close-up.

6. Crop bodies in an aesthetically pleasing way
Then there’s the problem of limbs. You don’t always have room to use the full body shot of a person in your slide so you have to crop. But where? There’s a general photography principle to avoid cropping a person at a joint.
Cropping at a body joint gives a photo an awkward look as shown on the left. Instead, crop at a place that doesn’t bend, as shown on the right. Cropping through the torso, mid-thigh, the waist and shins works with most photos. These are not hard and fast rules as it will depend on the shot.

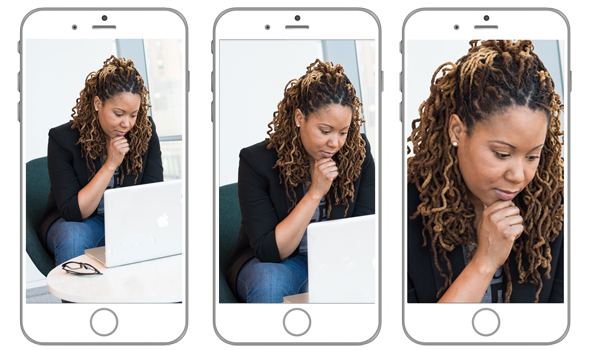
7. Crop while taking the shot
Photographers often recommend doing your cropping while taking the photo rather than in post-production. Known as cropping in-camera, this technique allows you to fill the frame with your subject at the resolution and size you want. Photo from Women of Color in Tech.
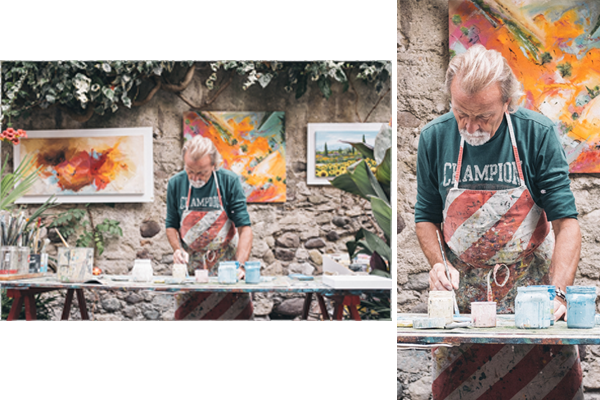
8. Crop to change the orientation of an image.
A horizontal orientation has a different effect on perception than a vertical one. You can use cropping to play with orientation to see what will work for your message and your layout. Photo by Eddie Klaus on Unsplash.
9. Crop close for a title screen
You can transform an extreme close-up of an object into a symbol of your topic. In an extreme close-up, the color, texture and lighting become the focal point, creating a compelling background for text. And because it may take a moment to recognize the object, it generates curiosity.

10. Crop to an eye-catching shape
The world may seem rectangular if you spend most of your day in front of a monitor. Because we are used to seeing photographs in a rectangular shape, using alternative shapes is another way to attract the viewer’s eye. In both of the examples below, the non-rectangular shapes add interest and focus to the photographs. Baby photo by Tim Bish from Unsplash.

For more ideas on how to modify stock photos, see How to Unstock Stock Photos.
For more ideas on cropping, see How to Crop a Photo to a Circle.
Get the latest articles, resources and freebies once a month
plus a Visual Design Cheat Sheet.

Thanks for your additions, Craig.
These are great! I love how you came up with so many practical and diverse tips, on what at first sight seemed like a straightforward topic.
Here are a couple of my favourite techniques: 1) Especially with a screenshot or other illustration, you can darken the unwanted part (like shining a spotlight on the point of interest), rather than actually cropping the image. Here’s a 4-minute video showing how you can do that dynamically in either Storyline or PowerPoint.
2) What you might call “uncropping”: Suppose all you have is a cropped photo with an extremely plain background, but you want to make the whole shot fill more space. For instance, you might want to extend the sky behind the hiker in your 3rd example, to make a portrait layout. In that case, you can duplicate the shot, flip it vertically, place it touching the top of the original, crop the top of it to remove the inverted rock and hiker (leaving only sky), then stretch it to fill the space you need. (I hope that makes sense!)
Hi Adriana,
I can so understand that. That’s the most controversial one and I didn’t like it when I first saw it years ago, but now I do 🙂
Thanks for your comment.
Connie
Hi Connie, great tips! The only one I am not comfortable with is cropping the head. In some cultures, it is considered disrespectful, but visually, I can see how it works well. Cheers, A
Thanks, June!
Thanks, Rebecca. Good to hear from you.
Great and easy tips… good examples. Love the one about clipping the head… something I shy away from but a great example of the positive impact when doing it.
Great tips! I will definitely use these. Thanks Connie. Always enjoy your articles.
Thank you – relevant, easy to follow. I’ll share with my peers!